
Mastering product photography requires a clear comprehension of both the technical and creative aspects involved. You need quality equipment, such as a DSLR camera and appropriate lighting, to achieve well-lit images. Choosing simple backgrounds and experimenting with angles can greatly improve your shots. After capturing the images, post-processing is vital for adjusting exposure and color. These foundational steps can transform your product presentation, but there’s much more to explore to truly raise your photography skills.
Key Takeaways

- Utilize natural light or professional lighting equipment to ensure consistent and flattering illumination on your products.
- Choose simple, neutral backgrounds to keep the focus on your product and enhance overall presentation.
- Experiment with different angles and compositions, applying the rule of thirds for balanced and engaging images.
- Use a sturdy tripod to eliminate camera shake, especially in low light, ensuring sharp, detailed photographs.
- Edit images with software like Adobe Lightroom to adjust exposure, color, and cropping for a polished final look.
Understanding Product Photography

Comprehending product photography is fundamental for anyone looking to effectively present their goods in a competitive market.
To take compelling product photos, especially with an iPhone, you need to grasp key concepts like lighting, composition, and background. Good lighting is critical, as it dramatically affects the overall look of your images. Natural light is often the best choice, but you can additionally use artificial sources to achieve the desired effect.
Regarding backgrounds, opt for simple, neutral colors like white or gray to keep the focus on your product. Remember, the brain processes visuals 60,000 times faster than text, making high-quality images imperative for capturing consumer attention.
As you learn how to take product photos, focus on creating emotional connections through your visuals, which can improve your brand narrative and ultimately influence purchasing decisions.
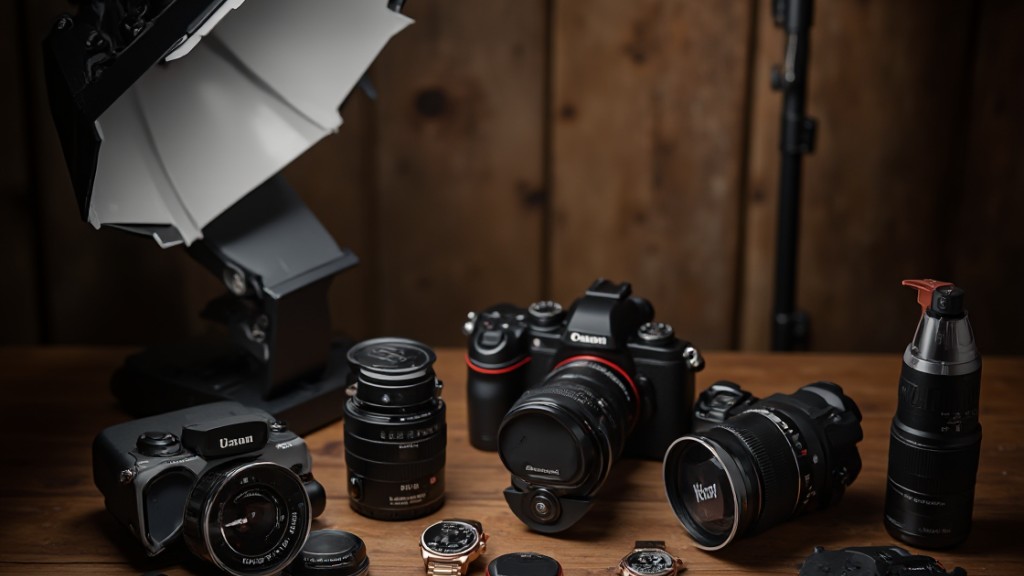
Essential Equipment for Product Photography

In relation to product photography, having the right equipment can make all the difference in capturing stunning images that showcase your products effectively.
Start with a professional DSLR or mirrorless camera, as it offers advanced features and the ability to shoot in RAW format, providing greater editing flexibility. Investing in a variety of lenses, such as a Canon 100mm macro for close-ups and a Nikon 24-70mm zoom for versatility, considerably improves the quality and depth of your shots.
A sturdy tripod is also essential for stability, eliminating camera shake and ensuring sharp images. Proper lighting equipment, like softboxes or continuous lighting, helps achieve consistent illumination across your product images.
Finally, don’t overlook accessories such as reflectors and backdrops, which are imperative for controlling shadows and creating a clean, professional look that raises the overall presentation of your products in photographs.
Techniques for Capturing the Perfect Shot
To capture the perfect shot in product photography, employing a variety of techniques is essential. Start by using a sturdy tripod to eliminate camera shake and guarantee sharp images, especially in low-light conditions. Experiment with different angles and perspectives, such as eye-level or 45-degree shots, to provide depth and showcase multiple sides of your product.
- Use a light meter to accurately set your exposure settings, optimizing aperture, shutter speed, and ISO for the best image quality.
- Incorporate props that align with the product’s personality, enhancing storytelling and creating visually appealing compositions.
- Apply the rule of thirds when framing your shots, achieving balanced and aesthetically pleasing images that draw attention to your product.
- Always review your setup and lighting before taking the final shot to confirm everything is perfect.
These techniques will help you create stunning product photos that stand out in any portfolio.
Post-Processing Tips for Enhanced Images

Even though capturing the perfect product shot is crucial, post-processing can improve your images even further. Using software like Adobe Photoshop or Lightroom, adjust exposure, contrast, and brightness for well-lit images. Apply color correction to guarantee your products maintain accurate colors. Cropping and straightening tools help eliminate distractions, centering your product effectively.
Here’s a quick guide to post-processing techniques:
| Technique | Purpose |
|---|---|
| Exposure Adjustment | Brighten or darken images for balance |
| Color Correction | Maintain consistent color across images |
| Cropping | Remove unwanted background elements |
| Retouching | Use spot-healing brushes to fix blemishes |
| File Optimization | Save images in web-friendly formats |
Implement these methods to create polished visuals that attract attention. Finally, save your images in suitable formats to improve loading times, guaranteeing a best user experience on online platforms.
Strategies for Effective Product Presentation

Effective product presentation is vital for capturing the attention of potential customers, as it directly influences their purchasing decisions.
To improve your product photography, consider the following strategies:
- Use clean, simple backgrounds like white or gray to maintain focus on the product.
- Incorporate props that complement the product, adding context and storytelling without overshadowing it.
- Experiment with various angles, such as eye-level and top-down views, to effectively showcase features and engage viewers.
- Verify proper lighting, utilizing natural light or softboxes to eliminate harsh shadows and highlight details.
Frequently Asked Questions

What Is the 20 60 20 Rule in Photography?
The 20 60 20 rule in photography suggests that you divide your composition into percentages: 20% for the subject, 60% for the background, and 20% for other elements.
This approach emphasizes negative space, allowing the subject to stand out as the background provides context.
What Are the 7 C’s of Photography?
The 7 C’s of photography are fundamental principles for creating impactful images. They include Clarity, ensuring sharp details in your subject; Composition, which involves arranging elements for balance; Contrast, enhancing the difference between light and dark areas; Color, adding vibrancy; Creativity, encouraging unique perspectives; Context, providing situational relevance; and Consistency, maintaining a cohesive style across your work.
Perfecting these principles can greatly improve your photography skills and overall visual storytelling.
How to Master Product Photography?
To master product photography, invest in a quality camera and versatile lenses.
Use proper lighting techniques, like softboxes, to control shadows and highlights, ensuring clarity.
Experiment with backgrounds and props, choosing simple options that complement your products.
Understand the exposure triangle—aperture, shutter speed, and ISO—to optimize image quality.
Finally, refine your skills in post-processing software like Adobe Photoshop or Lightroom to improve color accuracy and overall image quality.
How to Take Breathtaking Photos?
To take breathtaking photos, start by stabilizing your camera with a sturdy tripod to prevent shake.
Experiment with lighting, using natural light or softboxes to improve details.
Apply the rule of thirds for balanced compositions, positioning key elements strategically.
Capture images from various angles, including close-ups, to highlight unique features.
Finally, edit your photos using software like Adobe Photoshop or Lightroom, adjusting exposure and color balance for a polished, professional look.
Conclusion

In summary, achieving proficiency in product photography requires attention to detail and the right tools. By investing in quality equipment, comprehending fundamental techniques, and utilizing effective post-processing methods, you can notably improve your product images. Remember to focus on maintaining a clean background and experimenting with different angles to highlight your product’s features. With practice and dedication, you’ll develop the skills necessary to create compelling visuals that attract and engage potential buyers, ultimately driving sales and increasing brand visibility.
Image via Google Gemini